
- Basic Understanding of App Development
- How To Create An App in 10 Easy Steps
- How Are Apps Classified by Device and Platform
- How Modern App Development Powers the Future of Business?
- How Much Does it Cost to Create an App?
- What Are Common Challenges in App Development and How to Overcome Them
- What Tools and Resources Help You Build an App?
- Create Your Own App From Scratch
- Wrapping It Up
- Frequently Asked Questions (FAQ)
Wondering how to create an app but not sure where to start?
Then you’re in the right place. Today, more than 70% of businesses rely on custom apps to boost efficiency, improve customer engagement, and generate revenue. From ecommerce stores and fitness trackers to learning platforms, internal tools, and small business apps, mobile applications have become essential in nearly every industry.
According to Statista, with global downloads surpassing 250 billion and mobile app revenues expected to exceed $935 billion, the demand for apps has never been higher. And the best part? App development isn’t just for big tech companies anymore, but it’s now a key growth strategy for startups, entrepreneurs, and enterprises of all sizes.
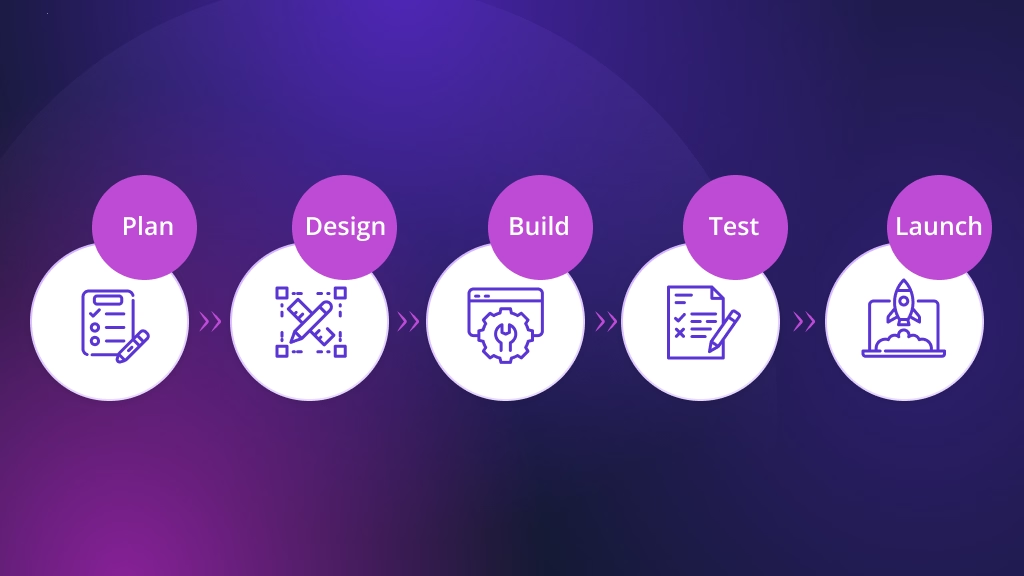
Whether you want to build an app for your business or launch the next big idea, knowing the step-by-step application development process is the first step. This complete guide will walk you through every stage:
- Define your idea and audience
- Research your market and competitors
- Plan features and design prototypes
- Choose your development approach
- Build and test your app
- Launch, market, and monetize
No matter what your goal is to expand your business, improve operations, or start something new, this guide will help you bring your vision to life.
But before we dive into the steps, let’s build a basic understanding of app development to set the foundation.
Basic Understanding of App Development
Before you dive into how to create an app, it’s better to get comfy with a few fundamentals. Think of this section as a mini app development tutorial that maps the app creation process so you can build an app step by step with confidence.
What Is App Development?
App development is the end-to-end process of planning, designing, building, testing, and launching software that solves a specific user problem. It includes:
- Strategy: define the problem, audience, and success metrics.
- App design and development: wireframes → UI/UX → coding (frontend + backend).
- Testing & iteration: fix bugs, refine flows, and improve performance.
- Delivery: publish to app stores or deploy to the web/desktop.
- Growth: analytics, updates, monetization, and ongoing maintenance.
Now that you know the basics of app development, let’s look at the must-do steps you should take before starting your own app journey.
How To Create An App in 10 Easy Steps
Creating an app doesn’t have to be complicated. By following a clear step-by-step app development process, even beginners can turn ideas into reality.
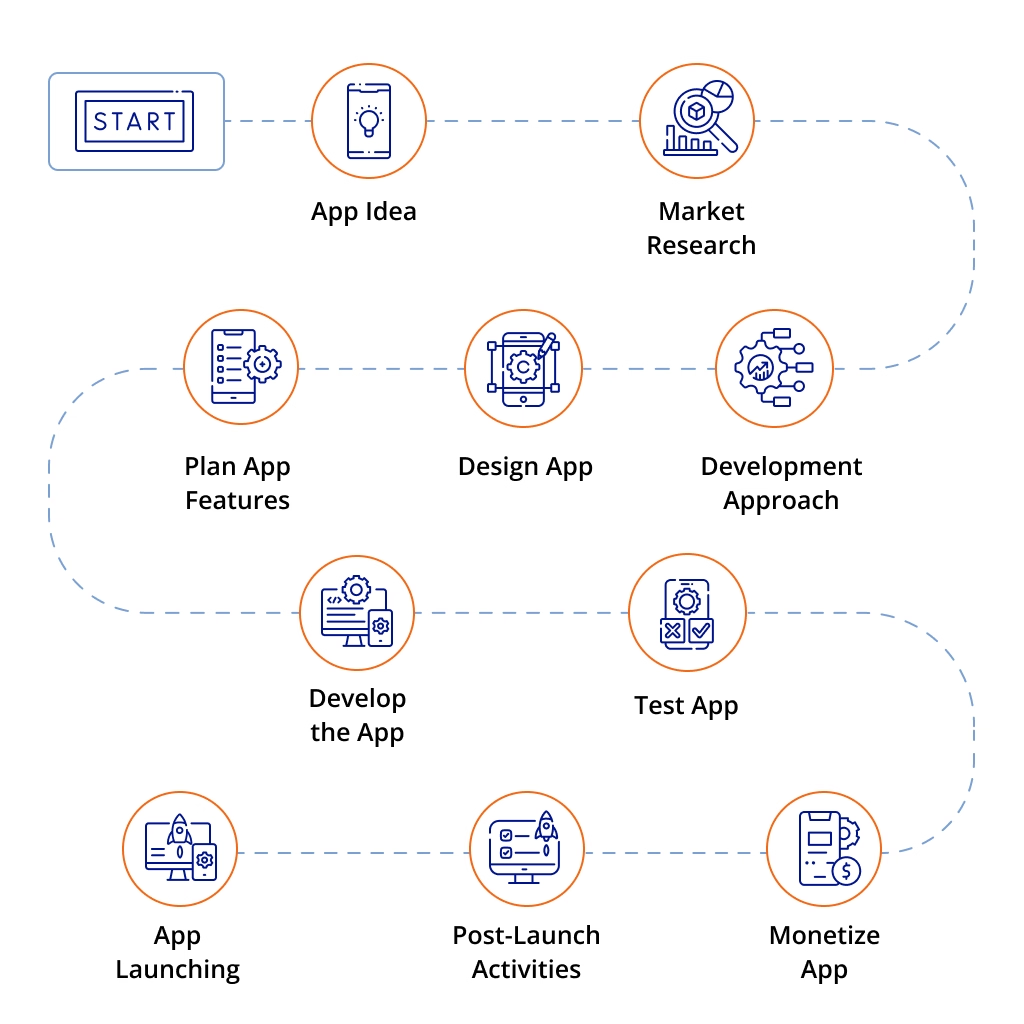
This app development guide breaks down steps to create an app in a simple, actionable way, helping you understand how to create an app from concept to launch. Here are the 10 easy steps to create an app at a glance:
- Shape Your App Idea
- Research the Market and Your Audience
- Map Out Features That Matter
- Design an Engaging User Experience
- Pick the Best Development Method
- Bring Your App to Life (Development Stage)
- Test, Refine, and Perfect Your App
- Get Ready to Launch Your App
- Nurture and Improve After Launch
- Turn Your App Into Revenue (Monetization)
Let’s break down the process further for a better understanding.
Step 1: Shape Your App Idea
Every great app begins with a big idea. But before diving into coding or design, you need to clearly define what problem your app solves and why people should care. This is the very first step in any app development guide, and skipping it often leads to wasted time and resources later.
Think of this as the blueprint for your entire app creation process. When you build an app step by step, your idea acts as the foundation that guides every decision, from design choices to feature priorities.
Questions to Ask Yourself:
- What is the main goal of my app? (E.g., e-commerce, fitness tracking, finance management, productivity)
- Who is my target audience? And what pain points will my app solve for them?
- What features are essential for launch, and which can come later?
- How does my idea stand out from competitors already in the market?
- Will my app be free, freemium, or paid?
Why This Step Matters
According to app industry reports, competition is fierce, with billions of downloads every year. A vague or poorly thought-out idea won’t survive. By shaping your idea carefully, you set yourself up for success in the rest of the app development tutorial, from design and coding to testing and launch.
In short: a strong app idea = a strong foundation. Without it, the rest of your app creation process will crumble.
Step 2: Research the Market and Your Audience
With millions of apps competing on the App Store and Google Play, a great idea alone isn’t enough; thus, you need solid research to stand out. Understanding your market and audience ensures your app isn’t just appealing in theory but practical in reality. Hence, below you get a small gist of why this research really matters and an effective way of conducting research:
Why Research Matters:
- Validates demand before you invest in development
- Reveals gaps and opportunities competitors may have missed
- Saves time and money by aligning with real user needs
- Builds confidence in your strategy
How To Research Effectively:
- Surveys & Feedback: Gather direct insights from potential users
- Competitor Analysis: Study what similar apps do well, and where they fail
- Behavior Insights: Track how people engage with apps in your niche
- Trend Spotting: Stay ahead by following emerging user expectations
By putting your audience at the center, you refine your app design, avoid common pitfalls, and give your app a unique edge.
Now that you know your users and market, the next step is to map out the features that truly matter.
Step 3: Map Out Features That Matter
After researching your audience and market, the next step is deciding which features your app truly needs. This stage is the backbone of your app development process, since it keeps your project focused, cost-effective, and user-friendly.
When creating an app, it’s tempting to pack in every cool idea. But the smarter approach is to start with an MVP (Minimum Viable Product), a version that includes only the most essential features to solve your users’ problems. You can always add advanced features later as your app grows.
When selecting your features, keep your MVP in mind by prioritizing only what’s essential for the first version. This helps you launch faster and refine the app based on real user feedback before expanding further.
Examples of popular app features include:
- User login and authentication
- Social media login
- User profiles
- Search functionality
- Push notifications
- In-app messaging or chat
- AI-powered chatbots or assistants
- AI-driven recommendations (products, content, friends)
- AI search (semantic search, voice search, image search)
- Content feeds
- Media uploads (images/videos)
- Image or video galleries
- GPS/location features
- Map integration
- Payment processing
- Shopping cart and checkout
- Booking and scheduling tools
- Reviews and ratings
- Offline access
- Dark mode
- Multi-language support
- Biometric login (FaceID/fingerprint)
- Data encryption and security
- File sharing
- Social sharing
- Real-time updates
- Personalized recommendations
- Analytics dashboards
- Integration with third-party services (Stripe, PayPal, Google Maps, etc.)
How To Prioritize these Features:
- Must-Have: Core functions like login, navigation, payments, or search.
- Nice-to-Have: Enhancements such as push notifications, personalization, or social sharing.
- Future Additions: Advanced tools like AI, GPS, or loyalty programs, once demand increases.
By focusing on features that matter most, you save time, reduce costs, and deliver a smooth experience from day one.
With your features mapped out, the next step is to design an engaging user experience that keeps people coming back.
Step 4: Design an Engaging User Experience
With your core features defined, the next step is to bring your app to life through UI (User Interface) and UX (User Experience) design. This stage is critical because how your app looks and feels directly shapes how users connect with it.
Create a Wireframe:
Before you begin designing your app visually, start with a wireframe. A wireframe is a simple, low-fidelity layout that illustrates your app’s structure, screens, and user flow. It’s not about colors or graphics, it’s about how the app works.
You can sketch your wireframe on paper, a whiteboard, or use digital tools. The goal is to map out the layout of each screen and show how users will move through the app.
Focus on:
- Screen structure
- Button placement
- Navigation flow
- What happens when a user taps or swipes
Map the user journey step by step. For example:
What happens when a user taps a button? Which screen comes next? How does Option A differ from Option B?
Wireframes help your entire team align on the functional vision of the app before investing time in design or development. They act as the blueprint for the next stages of the project.
Move To Mockups & Prototypes:
- Mockups show colors, fonts, and layouts, helping you visualize the final design.
- Prototypes let you test interactions early, so you can fix usability issues before coding begins.
Keep users at the center:
- Ensure navigation is clear and intuitive
- Maintain consistency in style and branding
- Prioritize accessibility for all users
- Gather feedback and refine continuously
Pro tip tools: Figma, Adobe XD, Sketch, and Balsamiq make wireframing and prototyping faster and more collaborative.
In short, great design isn’t just about looking good; it’s also about creating an intuitive, engaging experience that keeps users coming back.
Now that your app design is set, the next step is to pick the best development approach to bring it to life.
Step 5: Pick the Best Development Method
Once your app’s features and design are ready, the next big decision is choosing the right development approach. This choice impacts cost, performance, scalability, and how quickly you can launch.
Main Methods To Consider:
- Native App Development
- Cross-Platform Development
- Hybrid App Development
- No-Code / Low-Code App Builders
What To Consider:
- Budget & timeline (native = costlier, cross-platform = faster).
- App complexity (basic apps can be PWAs, advanced ones need native).
- User experience (speed, responsiveness, offline use).
- Future updates (ease of scaling and adding features).
By aligning your development path with your goals, you’ll save time, reduce costs, and set a strong technical foundation for success.
With your approach decided, it’s time to bring your app to life in the development stage.
Step 6: Bring Your App to Life (Development Stage)
Now that you’ve planned your app, it’s time to bring it to life! The development stage is where your ideas turn into a fully functioning app. Whether you’re a beginner or looking to refine your skills, understanding the app creation process is key to success.
Step-by-Step App Development Guide
To make this stage easier, here’s a simple roadmap:
- Follow a Clear Development Plan
- Build Your App Step by Step
- Test as You Go
How to Create an App With Native Development
Native development means building your app with platform-specific programming languages and tools. If you’re not a programmer, you’ll need to hire experienced developers who specialize in native iOS or Android development.
To launch your app on both platforms, you typically need two separate developers or teams, one for iOS and one for Android, since each uses different technologies and requires its own deployment process. While some developers can work on both platforms, having one person do everything will significantly slow down the project and won’t necessarily reduce costs.
Beyond mobile developers, you’ll also need a backend or full-stack developer to build and manage your server-side infrastructure, databases, and cloud services.
The advantage of native development is that it offers maximum flexibility and performance. Because you’re coding directly for each platform, you can implement virtually any feature. This makes native development ideal for apps with heavy graphics, advanced interactions, gaming, or augmented reality.
However, this approach also comes with higher costs and longer development timelines compared to other methods.
How to Create an App With Cross-Platform Development
Cross-platform development lets you build one app that works on both iOS and Android using a single codebase. Frameworks like Flutter and React Native make this possible.
Because you’re only building the app once, development is faster and more affordable than creating separate native apps. One development team can handle both platforms, and updates are easier since you update the code only once.
Cross-platform apps offer good performance and a smooth user experience for most app types. You’ll still need a backend developer to handle your server, database, and APIs.
This method is great for businesses or startups that want to launch on multiple platforms quickly without high development costs.
How to Create an App With Hybrid App Development
Hybrid app development lets you build an app using web technologies like HTML, CSS, and JavaScript, and then wrap it in a native container so it can run on both iOS and Android. Frameworks such as Ionic or Cordova make this possible.
Hybrid apps are quicker and cheaper to build than native apps because most of the code is shared across platforms. They’re a good option for apps that mainly display content, forms, or simple interactions.
However, hybrid apps may not perform as smoothly as native or cross-platform apps, especially if your app needs heavy animations or advanced device features. You may still need a backend developer for server-side work.
Hybrid development is ideal for simple apps or projects that need to launch fast on multiple platforms with a limited budget.
How to Create an App With No-Code / Low-Code App Builders
No-code and low-code platforms let you create an app without needing to write traditional code. These tools offer drag-and-drop editors, prebuilt templates, and ready-made components that make the development process much faster and more accessible.
You can design screens, add features, and publish to app stores on your own, which greatly reduces costs and eliminates the need for a full development team. This method is ideal for beginners, small businesses, or anyone who wants to launch an app quickly.
While no-code/low-code builders are powerful, they may have limitations if your app requires very advanced or highly customized functionality. However, for most simple to medium app ideas, such as booking tools, content apps, or basic e-commerce, they are more than enough.
This approach is perfect for creating an MVP, testing a concept, or building an app on a limited budget and timeline.
Tips for a Smooth App Creation Process
- Choose the right technology stack based on your app’s needs.
- Keep your users in mind during app design and development.
- Stay flexible, and sometimes adjustments are needed during coding.
By following this app development guide, you can confidently turn your concept into a live app that users will love. With patience, creativity, and the right approach, your app will truly come to life!
Now that your app has come to life, it’s time to polish every detail in the testing stage to ensure a seamless user experience
Step 7: Test, Refine, and Perfect Your App
Building your app is only half the journey; hence, the next step is testing. This stage ensures your app runs smoothly, delivers a great user experience, and is free from bugs.
Along with basic testing, include a structured QA process. This may involve functional tests, device compatibility checks, performance testing, and usability testing to ensure the app runs smoothly and provides a consistent user experience.
Why testing matters: It’s not just about fixing errors but also about confirming your app works across devices, aligns with your vision, and is ready for real users.
Key areas to test:
- Functionality: Make sure buttons, forms, and features work properly.
- Usability: Check navigation and gather real user feedback.
- Performance: Test speed, load times, and responsiveness.
- Compatibility: Ensure it runs on different devices and OS versions.
- Security: Protect user data and prevent vulnerabilities.
Pro tips: Test early and often, use automation tools for efficiency, and document bugs to track fixes.
In short, thorough testing refines your app, making it reliable, user-friendly, and launch-ready.
With testing complete, you’re ready for the most exciting stage: launching your app to the world.
Step 8: Get Ready to Launch Your App
You’ve built, tested, and refined your app, and now it’s time for the big moment: launching it to the world. But before hitting publish, careful preparation can make the difference between a smooth debut and a rocky start.
Pre-Launch Essentials:
- App Store Guidelines: Ensure compliance with Apple and Google Play requirements.
- Beta Testing: Test with real users to catch last-minute bugs.
- App Store Optimization (ASO): Write an engaging title, description, and keywords.
- Marketing Prep: Build buzz through social media, email campaigns, or influencer outreach.
- Visual Assets: Use screenshots and demo videos to showcase your app’s best features.
Publishing Tips:
- iOS requires stricter reviews and adherence to Apple’s Human Interface Guidelines.
- Android approvals are faster but still demand compliance.
- For cross-platform apps, optimize assets for both stores.
When launching, make sure to prepare your App Store and Google Play submission materials, including screenshots, descriptions, and privacy details. Each store has review guidelines, so following them carefully helps avoid delays or rejections.
But remember, launch isn’t the finish line but just the beginning. Next comes the crucial step: nurturing and improving your app after launch.
Step 9: Nurture and Improve After Launch
After launch, continue improving your app by analyzing user behavior, running small tests, and releasing updates based on real feedback. Iterative improvements help increase engagement and long-term success.
Why post-launch care matters: Even after thorough testing, real users will reveal new needs, bugs, or opportunities. Regular improvements keep your app relevant, user-friendly, and competitive.
Key Ways To Improve After Launch:
- Monitor performance: Track crashes, speed, and load times.
- Collect feedback: Use reviews and ratings to guide updates.
- Release updates often: Fix bugs, improve security, and add features.
- Analyze user behavior: Learn how users interact to refine design.
- Refine design: Enhance usability and keep the app visually fresh.
Think of your app as a living product, and continuous improvement ensures it doesn’t just survive but thrives in the market.
Once your app is stable and growing, the next step is even more exciting: turning your app into revenue through smart monetization.
Step 10: Turn Your App Into Revenue (Monetization)
Building and launching your app is a big win, but making it profitable is what ensures long-term success. Choosing the right monetization model is a crucial step in the app creation process.
Popular Monetization Strategies:
- In-App Ads: Great for free apps with a large user base.
- Freemium Model: Offer basic features free, with paid upgrades.
- In-App Purchases: Sell digital goods, content, or upgrades.
- Subscriptions: Charge recurring fees for access which is ideal for fitness, education, or media apps.
- Paid Apps: One-time download fee for premium apps.
- Partnerships & Sponsorships: Collaborate with brands for mutual benefits.
How To Choose:
Match your model to your audience, app type, and competitor insights. For example, gaming apps often succeed with in-app purchases, while lifestyle or news apps may thrive on ads or subscriptions.
Pro tips:
- Keep user experience first and don’t overload with ads or paywalls.
- Test and refine your model over time.
- Deliver real value so users feel confident paying.
In short, monetization isn’t a one-time step; it’s an ongoing process. By aligning the right strategy with your audience and app design, you can transform your app into a sustainable revenue stream.
Earning revenue is important, but protecting your app and users is just as crucial. This is where planning your app’s security comes in. Below is a bonus step to help you plan security for your app effectively.
# Bonus Step: Plan Your App Security

When learning how to create an app, security is a step you can’t skip. Even a small vulnerability can damage your users’ trust and your business reputation. Making security part of your app development process from the beginning is essential.
Ways to secure your app:
- Encrypt data: Protect sensitive information in databases, caches, and APIs.
- Use verified APIs: Only integrate APIs that meet platform security standards.
- Strong authentication: Apply token-based or session-based logins with expiration times.
- Tamper detection: Add security tools that prevent hackers from altering your app.
- Regular testing: Continuously review and test your code to fix issues early.
By prioritizing security, you build user trust and protect your app from costly risks.
Security lays the foundation for a reliable app. Next, let’s see how apps are classified by device and platform.
How Are Apps Classified by Device and Platform
Apps today aren’t one-size-fits-all; they’re built for different devices and platforms, each serving unique user needs and experiences.
| Device | Platform |
|---|---|
| Mobile Apps (iOS/Android) Store download Touch/GPS/sensors Offline-ready Best for frequent, on-the-go tasks | Native (Swift/Kotlin) : Full device APIs Top performance/UX Separate builds → higher cost/time |
| Web Apps & PWAs : Run in browser No install PWA = offline + notifications + installable Best for widest reach & rapid updates | Cross-Platform : (Flutter/React Native) One codebase for iOS/Android Near-native feel; occasional platform gaps |
| Desktop Apps (Windows/macOS/Linux): Installed · keyboard/mouse · high power Best for long, complex workflows | PWAs (Web-based) : Install from browser Auto-updates Limited OS integrations & app store presence |
| Smartwatch Apps : (watchOS/Wear OS) Tiny UI Glanceable info Voice/sensors Best for micro-interactions & fitness | Hybrid : (Web in native shell) Reuse web code Fast build/update Performance/UI limits for heavy features |
In short, your choice of device and platform shapes your app’s performance, cost, and reach, making it one of the most critical decisions in the app development process.
How Modern App Development Powers the Future of Business
In today’s digital-first world, web and mobile applications have become more than just tools; they are the backbone of business growth and innovation. Modern app development isn’t only about coding; it’s about building seamless, customer-centric experiences that put your brand directly into the hands of your audience. Here are some possibilities of how, by investing in app design and development, businesses can:
- Expand Reach
- Enhance Engagement
- Streamline Operations
- Boost Brand Loyalty
- Gain Insights
Whether you’re a startup or an established enterprise, learning how to create an app step by step can transform the way you operate and compete in a fast-paced digital landscape.
How Much Does it Cost to Create an App?
If you’ve been researching how to create an app, one of the biggest questions on your mind is probably: “What’s the price tag?”
The answer isn’t one-size-fits-all. App costs depend on your idea, features, and the approach you take to development. However, according to data collected from GoodFirms, the price range is as follows:
Average App Development Costs:
- Simple apps: $12,960 to $30,240
- Medium apps: $34,560 to $60,480
- Advanced apps: $56,160 to $82,080 (complex platforms can exceed $300,000)
Main Factors That Affect App Cost:
- Development Method – Custom coding is expensive, while drag-and-drop or app builder platforms are more affordable.
- Complexity – Basic apps (like ebooks or calculators) cost less, while apps with GPS, messaging, or custom accounts require higher budgets.
- Features – The more features you add, the higher the price.
- Target Platforms – Building for iOS and Android separately costs more than using hybrid or cross-platform tools.
App cost varies depending on the development method. Native apps are usually the most expensive, cross-platform is more budget-friendly, and no-code builders cost the least but have limitations. Your method choice can significantly influence overall cost.
| Development Method | Typical Cost Range |
|---|---|
| Native Development | Highest ($$$–$$$$) |
| Cross-Platform Development | Moderate–High ($$–$$$) |
| Hybrid Development | Moderate ($$) |
| No-Code / Low-Code Builders | Lowest ($–$$) |
Development Approaches by Cost:
- Custom Coding – Most expensive, highly flexible.
- Hybrid Development – Balanced cost and performance.
- Rapid App Tools / Templates – Faster, more budget-friendly.
- Drag-and-Drop Builders – Most cost-effective but limited in customization.
Budgeting is just one piece of the puzzle; the next step is learning the key challenges you’ll face when creating an app from scratch and how to tackle them effectively.
What Are Common Challenges in App Development and How to Overcome Them
Figuring out how to create an app is exciting, but the journey often comes with a few bumps. Here are some common challenges in the app creation process and easy ways to tackle them.
Challenge #1: Finding the Right Idea
Many apps fail because they don’t solve a real problem.
Remedy: Validate your idea with research before you start.
Challenge #2: Too Many Features
Trying to add everything at once makes development slow and confusing.
Remedy: Build an app step by step, starting with core features first.
Challenge #3: Poor Design
Even a useful app won’t succeed with bad design.
Remedy: Focus on app design and development that’s clean, simple, and user-friendly.
Challenge #4: Bugs and Technical Issues
Glitches can frustrate users.
Remedy: Test your app regularly throughout the app development tutorial process.
Challenge #5: Budget & Time Limits
Underestimating costs or timelines can derail your project.
Remedy: Plan realistically and break tasks into phases.
Overcoming these challenges gets you one step closer to success. Now let’s look at the best tools and resources to make app development easier.
What Tools and Resources Help You Build an App?
When learning how to create an app, the right tools can make the process much smoother. From design to coding, there are plenty of resources to guide you through the app creation process.
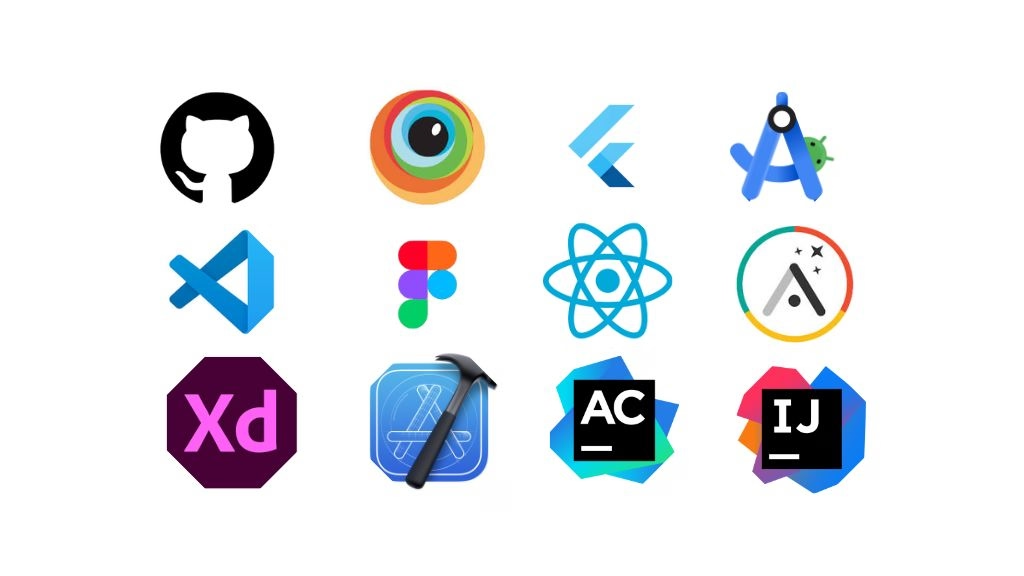
Popular Tools You Can Use
- App Builders: Easy, no-code options like Appy Pie or Adalo for beginners.
- Design Tools: Create wireframes and prototypes with Figma, Adobe XD, or Sketch.
- Code Editors & Frameworks: For custom apps, use VS Code, Flutter, or React Native.
- Testing Platforms: Check performance and compatibility with Firebase Test Lab or BrowserStack.
Helpful Resources
- Guides & Tutorials: Blogs, YouTube, and online courses for step-by-step learning.
- Developer Communities: Stack Overflow, GitHub, Reddit for quick problem-solving.
- Official Docs: Learn best practices for tools like Flutter, React Native, or Swift.
- AI Chatbots: Tools like ChatGPT, Google Bard, and Microsoft Copilot can help brainstorm ideas, generate code snippets, or debug issues instantly.
Armed with the right tools and resources, you’re ready to bring your app idea to life. Now let’s wrap it all up with some final takeaways.
Create Your Own App From Scratch
When you decide to build an app yourself, you’re essentially choosing a technology path, a set of languages, frameworks, compilers, and tools that determine how your app runs, how fast it performs, and how easy it will be to maintain. I’m going to walk you through these options, so you understand not just what to choose, but why you’d choose one approach over another.
Think of this as your guided map to selecting the correct stack.
Native iOS Development
When developing for iOS, your primary language is Swift. Swift is a compiled language that goes through LLVM and produces optimised ARM64 machine code. What this gives you, especially as a solo developer, is predictable performance, safer memory management, and the ability to leverage Apple’s powerful APIs like Metal (graphics), Core ML (machine learning), Core Location, etc.
Apple’s ecosystem is very controlled. That means you must use macOS, and you must have a developer account to ship apps. But the tradeoff is consistency: iOS devices behave very predictably, which makes debugging easier.
Native Android Development
Android apps run on the ART runtime. Here, you’ll use Kotlin (preferred today) or Java. Kotlin’s big advantage is that it gives you modern language features coroutines for concurrency, null-safety, sealed classes, and inline functions, all of which help you build cleaner architecture with fewer bugs.
Android Studio provides tools for:
- CPU, memory, and network profiling
- ADB debugging
- Gradle-based modular builds
- Jetpack libraries for lifecycle and architecture management
If your app needs heavy computation, image processing, real-time audio, or physics, you can drop down to C/C++ using the NDK. But be aware: when you work at this level, memory and thread management become your responsibility, so the learning curve is higher.
Cross-Platform & Hybrid Development
Instead of building two separate native apps, cross-platform frameworks let you share most of your codebase. Think of this as building once and deploying everywhere.
To understand these tools, you should know they come in two categories:
- Compiled UI frameworks: These render UI using their own rendering engine. They often give you smoother animations and better frame consistency.
- Bridge-based frameworks: These rely on message passing between JavaScript and native components. They are more flexible but can suffer performance hits during heavy UI operations.
As a developer, the key thing to remember is this:
Cross-platform solutions save time and effort, but you still need to handle platform-specific quirks especially anything involving sensors, background tasks, or platform-specific UI patterns.
Hybrid (WebView-based) apps sit one level above this. They’re basically web apps wrapped inside a native container. These are fine for content-heavy apps but not ideal for performance-sensitive use cases.
Progressive Web Apps (PWAs)
PWAs run inside a browser sandbox. That means your access to hardware features is limited. You can do push notifications (with restrictions), offline mode, and light background tasks. But you cannot get full access to sensors, biometrics, Bluetooth, or advanced background services the way you can in native development.
PWAs shine when you want:
- instant updates
- zero app store overhead
- cross-platform deployment
- lightweight architecture
But they fall short for complex or hardware-heavy apps.
Native vs Cross-Platform vs PWA to Create an App
| Criteria | Native Development (iOS: Swift, Android: Kotlin) | Cross-Platform (Shared Codebase) | Progressive Web App (PWA) |
|---|---|---|---|
| Runtime Execution | Compiled to ARM64 machine code via LLVM (iOS) / ART runtime (Android) | Engine-rendered or JS bridge runtime depending on framework | Browser-based JS VM, Service Worker layer |
| Performance | Highest performance; predictable frame times; direct GPU/CPU access | Near-native for compiled engines; JS-bridge frameworks may introduce latency | Limited by browser sandbox; slower for complex UI/graphics |
| Hardware Access | Full access to sensors, biometrics, Bluetooth, NFC, camera, GPU | Most features accessible via native modules; sometimes requires platform-specific code | Limited hardware APIs; restricted access to sensors, background services |
| Concurrency Model | Structured concurrency (Swift async/await), Kotlin coroutines, native threads | Depends on framework (Dart isolates, JS event loop) | JS single-threaded event loop + async APIs |
| UI Rendering | UIKit/SwiftUI (iOS), Jetpack Compose/XML (Android) | Custom rendering engine or JS-to-native bridges | DOM rendering via HTML/CSS |
| Memory Management | ARC (iOS), GC (Android ART) | Framework-dependent; often GC or managed memory | Browser-managed GC; less deterministic |
| Tooling & Build System | Xcode, Android Studio, Gradle, Instruments, profilers | Varies: custom CLI tools, hot reload engines, third-party profilers | Webpack/Vite, Lighthouse, browser devtools |
| Offline Capability | Full offline support with local DBs (CoreData, SQLite, Room) | Same as native when using platform storage | Service Workers + IndexedDB, but limited background sync |
| Distribution | App Store / Google Play (requires signing, review, compliance) | Same app store requirements as native | Distributed via web URL; optional “install” prompt |
| Security Model | Deep OS-level integration, secure enclaves, strong sandboxing | Inherits native security model but depends on framework updates | Browser sandbox; limited access to secure hardware |
| Development Velocity | Slower (separate iOS + Android codebases) | Faster (shared logic + shared UI in many frameworks) | Fastest — single codebase and continuous deployment |
| Best For | High-performance apps, AI/ML, games, AR, complex enterprise apps | Multi-platform MVPs, startups, most commercial apps | Lightweight apps, content apps, tools that don’t require native hardware |
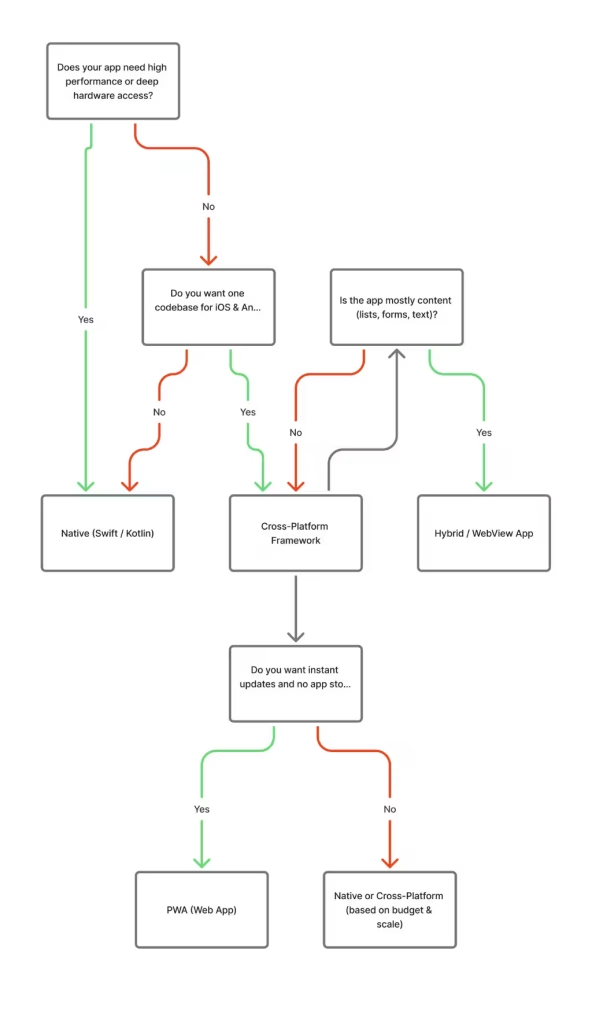
Which Tech Stack Should You Choose?
Enhance Your App With AI-Powered Features
Artificial intelligence is becoming a core part of modern mobile apps. Whether you’re building a simple tool or a large-scale platform, AI can help your app deliver smarter, faster, and more personalized experiences.
Integrating AI doesn’t require building complex models from scratch; today’s frameworks and APIs make advanced intelligence accessible even for small teams.
| AI Function | Technical Description | Use Cases |
|---|---|---|
| Personalization Engines | Behavioral modeling, embeddings, real-time inference | Recommendation systems, adaptive UI, dynamic content |
| Semantic & Multimodal Search | Vector search, NLP embeddings, ASR, image feature extraction | Voice search, semantic search, visual lookup |
| Conversational AI | NLP pipelines, LLM inference, intent classification | Chatbots, virtual agents, automated support |
| Predictive Modeling | Time-series forecasting, anomaly detection, classification | Fraud detection, churn prediction, pricing models |
| Vision Models | CNN/CV pipelines, OCR, object/face detection | Scanning, AR preprocessing, content recognition |
| Workflow Automation | ML-based classification, queue prioritization, summarization | Content moderation, task routing, workload balancing |
| On-Device ML | Edge inference using Core ML, TFLite, quantized models | Offline processing, low-latency classification |
| Cloud ML / LLM APIs | Server-side model execution, scalable inference | Large models, NLP, deep vision tasks |
| Hybrid ML Architecture | Split inference: lightweight local + heavy cloud | Optimized performance + advanced capabilities |
Wrapping It Up
Creating an app may sound complicated at first, but with the right plan, tools, and guidance, it becomes much more manageable. Whether you’re using an app development guide, following an app development tutorial, or choosing to build an app step by step, the process is easier when you stay organized and focused on your goals.
Key Takeaways
- Always start with a clear plan before jumping into the app creation process.
- Keep things simple, and add features gradually instead of all at once.
- Focus on app design and development that delivers a smooth user experience.
- Choose the method that fits your skills and budget: DIY, hiring developers, or using an app builder.
- Remember that an app can boost your business by improving brand visibility and customer engagement.
However, the journey of learning how to create an app is ongoing, but each step takes you closer to turning your idea into a reality.
Still have questions? Don’t worry, the FAQ section covers the answers you need.
Frequently Asked Questions (FAQs) on How to Create an App
Have questions about building an app? This FAQ covers the essentials, from the app creation process to tips on app design and development, helping you get started quickly and confidently.
How can I create my own app?
You can create your own app by following a clear step-by-step app development guide. The process usually includes:
1. Define your idea and the problem it solves
2. Research your target audience
3. Plan core features
4. Design wireframes and mockups
5. Develop the app (UI/UX + coding)
6. Test for bugs and performance
7. Launch on app stores
8. Keep updating and marketing
How long does it take to create an app?
If you’re using a no-code platform, you could launch in a few days. But for traditional coding, following a detailed app development guide, the timeline usually ranges from 2–6 months, depending on features and testing.
Which is better: iOS or Android for my first app?
It depends on the target audience and the business structure demand:
1. iOS is great for markets like the US and Europe with higher monetization potential.
2. Android dominates global markets, making it ideal for mass reach.
3. Many developers now use cross-platform frameworks to publish on both, ensuring broader visibility.
Do app owners earn money?
Yes! App owners can earn money through in-app purchases, ads, subscriptions, or paid downloads. The revenue depends on your app’s type, audience, and monetization strategy, and following a good app development guide can help you plan for profit from the start.
Do I need coding skills to create an app?
Not necessarily! While traditional app design and development often require coding knowledge, there are plenty of no-code and low-code platforms that let you build an app step by step without programming. Tools like Appy Pie, Bubble, or Glide can simplify the app creation process.
How do I make sure my app succeeds after launch?
Launching is just the beginning! Focus on:
1. Collecting user feedback.
2. Updating regularly with bug fixes and new features.
3. Investing in app store optimization (ASO).
4. Using marketing strategies to grow your user base.
What are common mistakes in app development?
Some common mistakes include overloading the app with unnecessary features, skipping market research, neglecting user experience, and poor testing. Following a clear app development guide and building an app step by step can help you avoid these pitfalls.
How much does it cost to publish an app on the app stores?
Publishing an app usually involves a one-time or annual fee:
Apple App Store: $99 per year for a developer account.
Google Play Store: $25 one-time registration fee
Do I need UI/UX skills to build an app?
Basic UI/UX knowledge is extremely helpful. Even simple decisions like spacing, navigation flow, and button placement can affect user experience. Tools like Figma help you create wireframes before coding.
How do I publish my app on the App Store or Google Play?
You need a developer account, screenshots, descriptions, policies, and a build that meets store guidelines. Apple reviews apps more strictly; Google Play reviews are usually faster.
Do I need a backend to create an app?
Not always. Static content apps or PWAs may not need one. Apps with login, databases, messaging, notifications, payments, or user-generated content require a backend (Firebase, Supabase, AWS, etc.).
How do I validate if my app idea is good?
Use surveys, landing pages, competitor analysis, prototypes, MVPs, and early user feedback. Validation saves time and prevents building features nobody wants.
What is the easiest way to build an app?
Using no-code or low-code platforms. They allow drag-and-drop UI creation, built-in templates, and one-click publishing without needing advanced coding skills.
Should I build an iOS app or an Android app first?
If your users are mainly in North America or have high-end devices, iOS may come first. If your audience is global or budget-conscious, Android may be better. Many developers now build both via cross-platform frameworks.
How much does it cost to create an app?
App costs vary widely. A simple app can cost a few hundred to a few thousand dollars (or less if you build it yourself). More complex apps like marketplaces, social platforms, or on-demand apps can cost significantly more due to backend and infrastructure needs.
Following a proper app creation process and app development guide ensures you meet all requirements before publishing, saving time and extra costs.
This page was last edited on 29 January 2026, at 2:45 pm
Contact Us Now

Contact Us Now
Start a conversation with our team to solve complex challenges and move forward with confidence.
It was such a great article which was on Mobile app development services. Here, I would like to add some easy points in your blog which are as follows.
1. Confuses users with messy layout.
2. Slows down app loading speed.
3. Wastes great features with bad visuals.
4. Lowers app ratings and reviews.
5. Pushes users to switch to competitors.
I hope these points might help your readers. If you want to design or create your website, you can visit an IT company like Alakmalak technologies. They have an experienced team in this field.