You’ve got an idea for an education app. Maybe it’s a language tutor, a K-12 quiz platform, or a corporate training tool. But you’re staring at a blank page, wondering where to even start?
We’ve been there. And this guide will walk you through exactly how to create an education app that learners actually use, enjoy, and keep coming back to.
Why the EdTech Market Is Worth Entering Right Now
Before we get into the how, here’s why this matters.
According to Grand View Research, the global eLearning services market is projected to reach $842.6 billion by 2030, growing at a CAGR of ~19% from 2025. (Source: Grand View Research)
That’s not a niche. That’s a massive opportunity — and it’s still wide open for apps that actually solve problems.
The demand is being driven by a few key shifts:
- Learners want flexible, bite-sized lessons they can access anywhere
- Companies prefer upskilling existing employees over hiring new ones
- Schools are actively looking for tools that reduce educator workload
- Mobile-first learners expect offline access and real-time feedback
Understanding this landscape is step one of knowing how to create an education app that sticks.
Step 1: Define Your Learning Audience and Problem
Don’t start with technology. Start with people.
The most common mistake we see is jumping straight into wireframes or code before really understanding who the app is for. Build for a vague “everyone” and you’ll end up reaching no one.
Ask yourself:
- Who is the primary learner? (K-12 students, corporate employees, adult self-learners?)
- What’s the core problem they face?
- What do existing apps get wrong for this audience?
If you have access to students or teachers, run a small group discussion. If not, a simple survey through Google Forms or SurveyMonkey can surface insights quickly.
For corporate training apps or LMS-integrated tools, this research phase is even more critical. Educators already have access to hundreds of apps — many of which their schools have paid for. Your job is to identify the gap.
Step 2: Understand How People Actually Learn
This is the piece most app developers skip — and it’s where most educational apps fail.
Effective Learning Design means creating experiences grounded in how the brain actually processes and retains information. You don’t need a PhD in cognitive science, but you do need to understand a few fundamentals.
Key principles to apply when building your learning app:
- Active learning — passive content consumption doesn’t stick; build in quizzes, interactions, and decision points
- Scaffolding — sequence content from simple to complex so learners build on what they already know
- Timely feedback — learners improve faster when they know immediately what they got right or wrong
- Spaced repetition — re-surfacing content at intervals dramatically increases retention
These aren’t optional nice-to-haves. They’re what separate an educational app from a content library.
Step 3: Choose Your App Type and Category
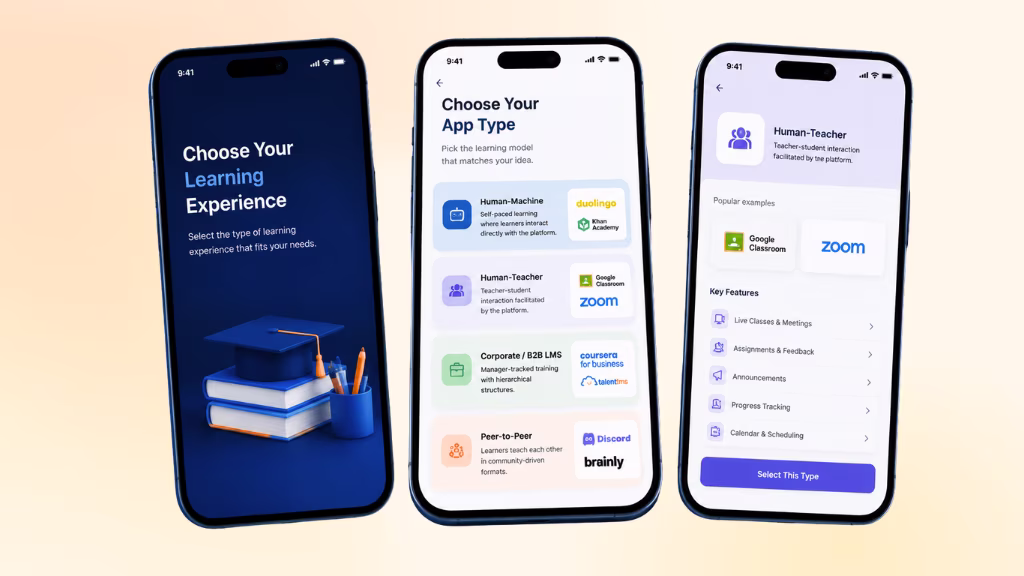
Not all learning apps are built the same. Before writing a single line of code, decide which model fits your concept.
| App Type | Description | Examples |
|---|---|---|
| Human-Machine | Learner interacts directly with the platform; self-paced | Duolingo, Khan Academy |
| Human-Teacher | Teacher-student interaction facilitated by the platform | Google Classroom, Zoom + LMS |
| Corporate/B2B LMS | Manager-tracked training with hierarchical structures | Coursera for Business, TalentLMS |
| Peer-to-Peer | Learners teach each other in community-driven formats | Discord Study Groups, Brainly |
Each type comes with its own set of technical and business requirements. A corporate LMS needs a GDPR-compliant data architecture and integration with HR tools. A kids’ learning app needs parental controls and accessibility features. Define your type early — it shapes everything downstream.
Step 4: Map Out Core and Advanced Features
We see a lot of teams try to build everything at once. Don’t. Start with what your learners absolutely need, then layer in advanced features over time.
Core features every educational app needs:
- User authentication and profile management
- Content creation and management system
- Progress tracking and completion status
- Push notifications and reminders
- In-app assessments and quizzes
- App performance monitoring
Advanced features to build toward:
- AI-powered personalization that adapts content to individual pace and gaps
- Gamification (points, badges, leaderboards, streaks)
- Offline access for mobile-first learners
- Peer forums and study group communities
- Live video classrooms or async video lessons
- Advanced analytics dashboards for teachers/admins
The rule we follow: if a feature doesn’t directly help a learner achieve a specific outcome, it’s not a core feature.
Step 5: Build a Prototype Before You Write Any Code
Here’s something veteran developers will tell you: prototyping saves months.
Start with pen-and-paper sketches of your app’s screens and user flows. It sounds low-tech, but it forces clarity. Once you’re happy with the concept, move to a low-fidelity digital mockup using tools like Figma or Adobe XD.
The goal is to answer: how does a user move from opening the app to completing their first learning task? Map every click, every screen, every decision.
Only after you’ve tested this flow with real users should you move to the next stage.
Step 6: Build a Minimum Viable Product (MVP)
An MVP is the smallest working version of your app that lets real users experience the core value.
For most educational apps, an MVP takes 1–3 months to build and costs roughly $50K–$100K when working with a professional team. This is not the final product — it’s a learning tool for your team as much as for your users.
No-code and low-code platforms are worth considering for faster MVP builds:
- Bubble — deep customization and workflow control
- Glide — great for turning spreadsheets into simple apps quickly
- Torus — built specifically for adaptive learning experiences
- Airtable — flexible data management with app-building capabilities
Get your MVP in front of 20–50 real users. Watch how they use it. Ask what confuses them. This feedback loop is worth more than any internal planning session.
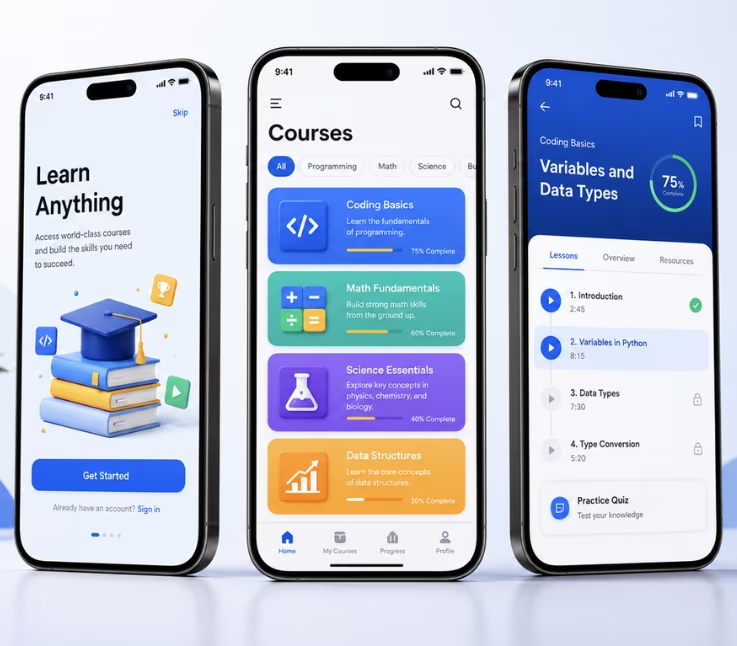
Step 7: Design a UI/UX That Actually Helps Students Learn
A beautiful app that’s confusing to use will get uninstalled. A plain app that’s intuitive will keep users coming back.
Good UI/UX for educational apps comes down to five non-negotiables:
- Clarity — Users should never have to guess where to tap or what to do next
- Consistency — Same colors, fonts, and interaction patterns throughout
- Responsive design — Works seamlessly on phones, tablets, and desktop
- Feedback and affordance — Visual confirmation when a user completes an action
- Accessibility — Color contrast, screen reader support, adjustable font sizes
We also recommend designing specifically for distraction-prone environments. Students are often using apps in classrooms, on commutes, or in short windows of free time. Every screen should be completable in under 3 minutes.
Step 8: Choose Your Tech Stack
The right technology depends on your team’s skills, budget, and target platform. Here’s a practical breakdown.
For mobile apps:
We recommend cross-platform frameworks so you can serve both iOS and Android users from one codebase:
- React Native — widely supported, large developer community
- Flutter — fast performance, increasingly popular for EdTech
For web-based apps:
Web apps are built with HTML, CSS, and JavaScript. Popular frameworks include React, Angular, and Vue.js.
For the backend:
Node.js, Python (Django or FastAPI), or Ruby on Rails — choice depends on team familiarity and scalability needs.
For AI features:
If you’re adding personalization or adaptive learning, explore integrations with OpenAI’s API, Google’s Vertex AI, or purpose-built EdTech ML tools.
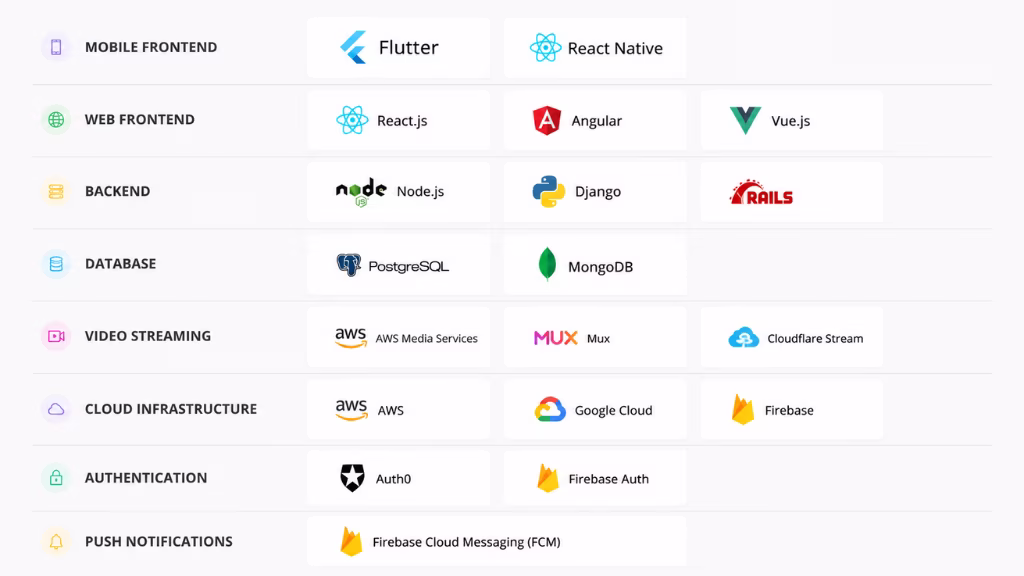
Here’s a straightforward breakdown of what we recommend:
| Layer | Recommended Options |
|---|---|
| Mobile Frontend | Flutter or React Native (cross-platform) |
| Web Frontend | React.js or Vue.js |
| Backend | Node.js, Django, or Ruby on Rails |
| Database | PostgreSQL or MongoDB |
| Video Streaming | AWS Media Services, Mux, or Cloudflare Stream |
| Cloud Infrastructure | AWS, Google Cloud, or Firebase |
| Authentication | Auth0 or Firebase Auth |
| Push Notifications | Firebase Cloud Messaging (FCM) |
For most early-stage education apps, we recommend Flutter or React Native: one codebase, two platforms (iOS and Android), faster development, and lower cost. If your users are primarily on desktop, start with a web app using React.js and add mobile later.
For video-heavy apps, invest in a dedicated video streaming infrastructure from day one. It’s technically the hardest part of education app development — and the most critical.
If you’re not a developer, hiring a fractional CTO or working with an EdTech development agency for the early stages is a legitimate path many successful apps have taken.
Step 9: Implement Learning Data and Analytics
This is one of the most overlooked parts of how to create a learning app — and one of the most valuable.
Without data, you’re guessing. With data, you can see exactly where learners drop off, what content drives outcomes, and what needs to be redesigned.
From day one, plan to track:
- Lesson completion rates
- Time-on-task per module
- Quiz accuracy and retry rates
- Feature engagement (what learners use vs. ignore)
- Drop-off points in the user journey
If your app needs to integrate with school or corporate LMS platforms like Canvas or Moodle, you’ll need to comply with xAPI (Experience API) or Caliper standards. These ensure your data can communicate with the wider ecosystem — and it’s a requirement for many institutional buyers.
Step 10: Test Thoroughly Before Launch
Testing is not a final step — it runs throughout the entire development process.
Three types of testing every education app needs:
- Unit testing — ensures individual components function correctly
- Integration testing — verifies that different parts of the app work together
- End-to-end testing — simulates real user journeys from login to lesson completion
Beyond technical testing, conduct user acceptance testing (UAT) with real students and teachers. This is the gap most competitors’ guides miss: technical testing tells you if the app works, UAT tells you if the app works for people.
Run at least two rounds of UAT before you submit to app stores.
Step 11: Launch on the Right Platforms
Once testing is complete, submit your app to both Apple’s App Store and Google Play. Each has its own review process, guidelines, and asset requirements — budget 1–2 weeks for approval cycles.
At the same time:
- Build a landing page with clear messaging about what the app does and who it’s for
- Create onboarding email sequences for new users
- Publish your app on your website with direct download links
- Promote on communities where your audience lives (Reddit, LinkedIn, teacher forums, Slack groups)
Your launch is not a finish line. It’s the start of a feedback loop.
Step 12: Choose a Monetization Model That Fits
The right monetization model depends on your audience and your product’s value proposition.
| Model | How It Works | Best For |
|---|---|---|
| Freemium | Free basic tier, paid advanced features | Apps targeting large consumer audiences |
| Subscription | Recurring monthly/annual fee | High-engagement apps with ongoing content |
| One-Time Purchase | Pay once for full access | Simple, content-complete tools |
| Ad-Supported | Free with in-app ads | High daily active use, broad audience |
| B2B/Enterprise Licensing | School or company pays per seat | LMS tools, corporate training |
| Hybrid | Combination of models | Apps with diverse user segments |
The freemium model dominates the consumer EdTech space right now because it lowers the barrier to try. But if your app targets schools or enterprises, seat-based or site licensing is far more lucrative and scalable.
One thing competitors rarely say: don’t finalize your monetization model until after your MVP. The data from early users will tell you what people actually value enough to pay for.
Step 13: Iterate Continuously Post-Launch
Launching is just the beginning. The apps that win in education are the ones that obsessively improve after launch based on real user behavior.
For app store visibility:
- Optimize your app title, description, and keywords for ASO (App Store Optimization)
- Collect early reviews — even 20–30 positive reviews dramatically improve conversion
- Use screenshots and preview videos that show the learning experience, not just the UI
For user acquisition:
- Content marketing targeting your niche audience (SEO blog posts, YouTube tutorials)
- Community partnerships with schools, educators, or professional associations
- Paid acquisition through Google UAC and Meta once you’ve validated retention metrics
Post-launch iteration checklist:
- Monitor drop-off points in the onboarding flow
- Track course completion rates — low completion signals content or UX issues
- Run A/B tests on push notification timing and copy
- Release regular updates based on user feedback to signal active development to app stores
The biggest gap we see between education apps that scale and those that stall is this: the ones that scale treat launch as version 1.0, not the finish line.
How Much Does It Cost to Create an Education App?
Costs vary widely based on features, team location, and complexity.
| App Type | Estimated Cost | Timeline |
|---|---|---|
| Basic MVP (core features only) | $10,000 – $30,000 | 3–4 months |
| Mid-range app (video, quizzes, payments) | $30,000 – $80,000 | 4–7 months |
| Full-featured platform (AI, LMS, live sessions) | $80,000 – $200,000+ | 7–12 months |
To reduce costs early on: use no-code/low-code tools like FlutterFlow or Bubble for prototyping, leverage managed backends like Firebase, and outsource content production to subject matter experts on contract.
What Others Don’t Tell You about Creating an Educational App
We’ve read what’s out there. Here’s what’s missing from most guides on how to develop an educational app:
Accessibility isn’t optional — it’s a market advantage. Apps that support screen readers, high-contrast modes, and adjustable text sizes don’t just serve learners with disabilities; they perform better in institutional purchasing decisions where accessibility compliance is evaluated.
Teacher buy-in determines student usage. If your app targets K-12 classrooms, the real gatekeeper is the teacher, not the student. Designing for teacher confidence — clear dashboards, minimal setup time, curriculum alignment — is as important as designing for student engagement.
Localization opens entire markets. Most EdTech guides assume an English-first, US-first product. Supporting multiple languages and culturally adapted content dramatically expands your addressable market, especially in Southeast Asia and Latin America.
Data privacy laws vary by region. COPPA in the US, GDPR in Europe, and regional equivalents elsewhere apply directly to apps used by minors. Non-compliance isn’t just a legal risk — it’s a trust risk that can destroy adoption in school districts overnight.
Final Thoughts
Creating an education app is one of the most meaningful things you can build. Done right, it changes how people learn — at scale, over time, often in ways you’ll never fully see.
Start with the learner. Prototype fast. Test with real users. Build on data. And never treat the launch as the end.
The apps that matter are the ones built by people who care more about outcomes than features.
FAQs
How much does it cost to create an education app?
A basic MVP runs $50K–$100K and takes 1–3 months. A full-featured app (AI, adaptive learning, iOS + Android) can hit $300K–$1M. If budget is tight, start with a no-code MVP on Bubble or Glide — you can validate the idea for under $10K.
Do I need coding experience to build an educational app?
No. No-code tools like Bubble, Glide, and FlutterFlow let you build functional prototypes without writing code. Once you’ve validated the idea with real users, then bring in developers.
How long does it take to develop an educational app?
An MVP: 1–3 months. A full production-ready app: 9–12 months. The biggest time sink isn’t development — it’s poorly defined requirements before you start.
What features does an education app need?
The non-negotiables: user login, content delivery, progress tracking, quizzes, and push notifications. Everything else — AI personalization, gamification, offline mode, live video — comes after your MVP is validated.
How do education apps make money?
The four main models: freemium (most popular), subscription, one-time purchase, and B2B/institutional licensing. If you’re targeting schools or companies, seat-based licensing pays far better than consumer subscriptions.
How do I make my education app engaging so users don’t drop off?
Short lessons (under 5 minutes), immediate feedback after every quiz, progress streaks, and bite-sized milestones. Gamification isn’t a gimmick — apps using it see measurably higher retention and completion rates.
Do I need to comply with any laws for a kids’ education app?
Yes — COPPA in the US (applies to any app collecting data from users under 13), GDPR in Europe, and similar laws elsewhere. Non-compliance isn’t just a legal risk — school districts and institutional buyers will reject your app outright if you can’t prove compliance.
This page was last edited on 2 June 2026, at 11:14 am

Start a conversation with our team to solve complex challenges and move forward with confidence.