Maven is a powerful build automation tool primarily used for Java projects. It simplifies project setup, dependency management, and deployment, making it a crucial tool for modern Java development. In this guide, we’ll walk you through the basics of Maven, how to set it up, and how to use it effectively in your Java projects. Along the way, we’ll indicate where to add screenshots for better understanding.
What is Maven?
Maven, a project management and comprehension tool, provides a way to help manage a project’s build, reporting, and documentation from a central piece of information. It’s built around the concept of a Project Object Model (POM), which is an XML file that contains information about the project and configuration details used by Maven to build the project.
Setting Up Maven
Step 1: Installing Maven
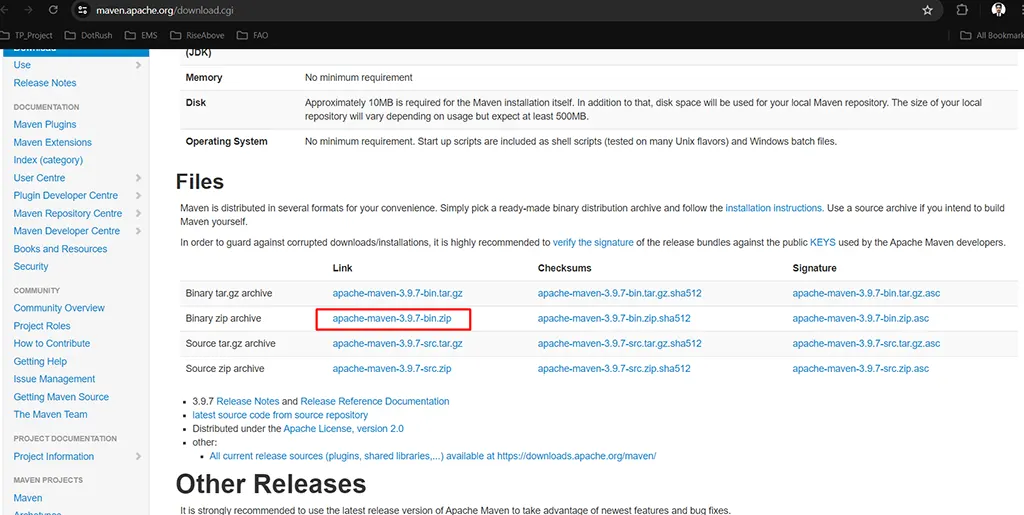
- Download Maven:
- Visit the official Maven download page.
- Download the binary zip archive for your operating system.
- Extract the Archive:
- Extract the downloaded archive to a directory of your choice.

- Configure Environment Variables:
- Add the MAVEN_HOME environment variable and point it to the Maven directory.
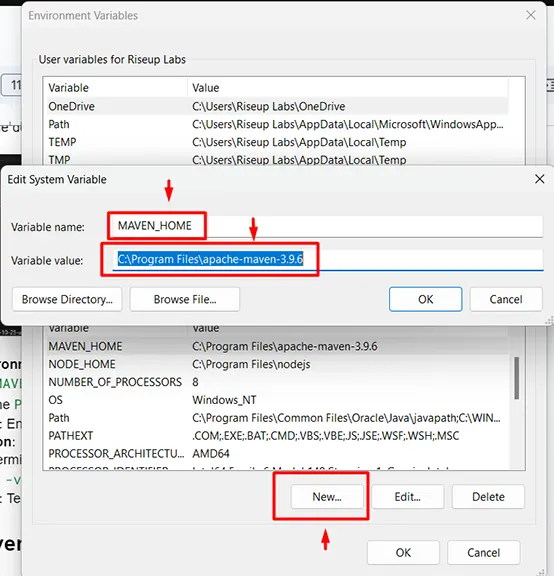
- Update the PATH environment variable to include Maven’s bin directory.

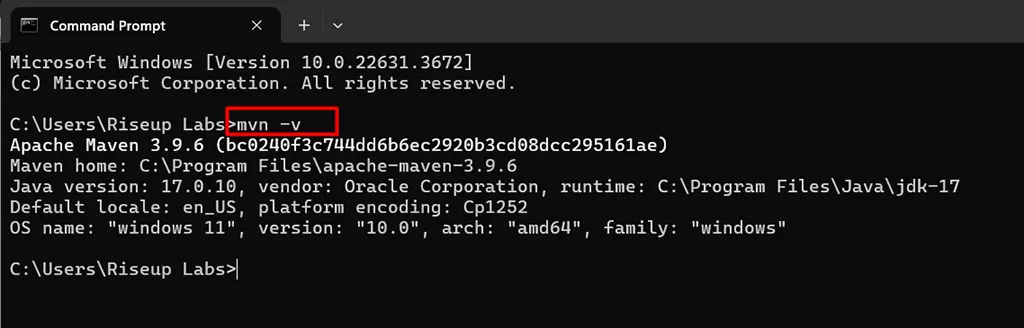
- Verify Installation:
- Open a terminal or command prompt.
- Run mvn -v to verify the installation.
Creating a Maven Project Using Eclipse
Step 2: Generating a New Project
- Open Eclipse:
- Launch Eclipse IDE on your system.
- Navigate to the New Maven Project Wizard:
- Go to File > New > Project….
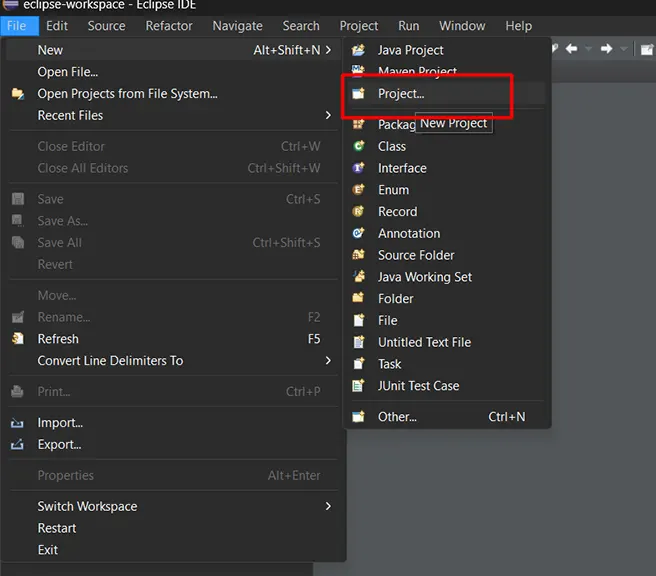
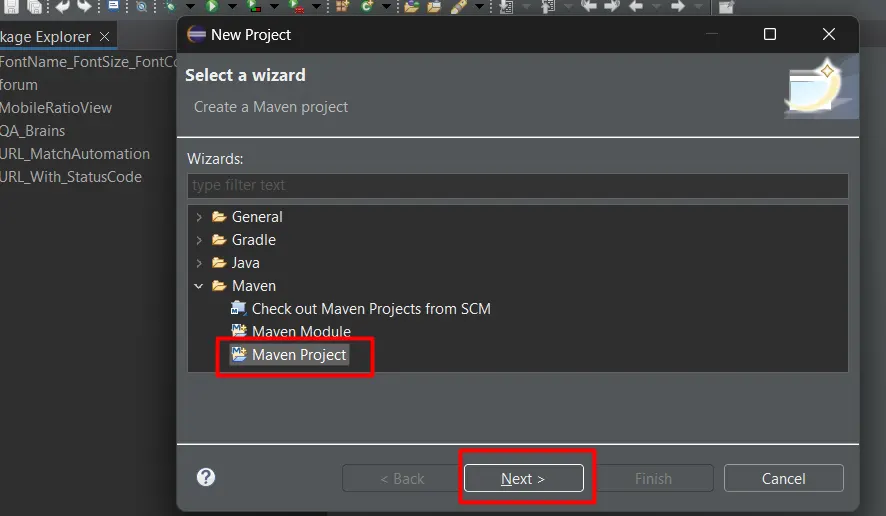
- Select Maven Project:
- In the New Project wizard, select Maven > Maven Project and click Next.
- Create a Simple Project:
- In the New Maven Project wizard, ensure Create a simple project (skip archetype selection) is unchecked. Click Next.

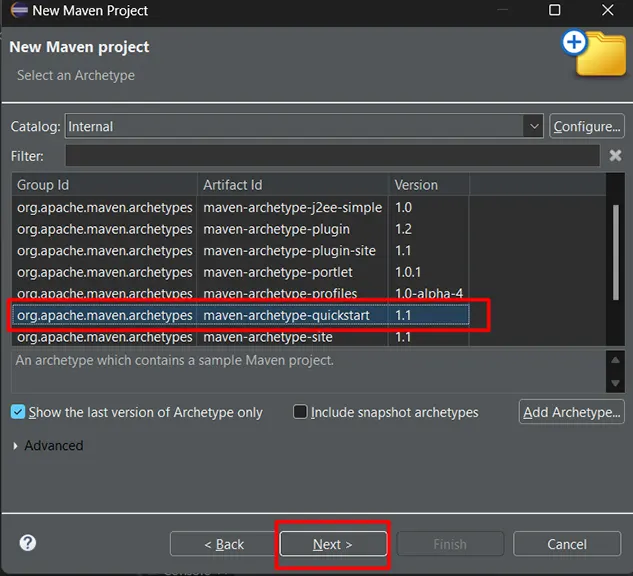
- Choose Project Archetype:
- In the Select an Archetype step, choose maven-archetype-quickstart and click Next.
- Enter Project Details:
- In the Enter groupId and artifactId step, fill in the details:
- Group Id: com.example
- Artifact Id: my-app
- Click Finish.
- In the Enter groupId and artifactId step, fill in the details:


Understanding the POM File
Step 3: Exploring pom.xml
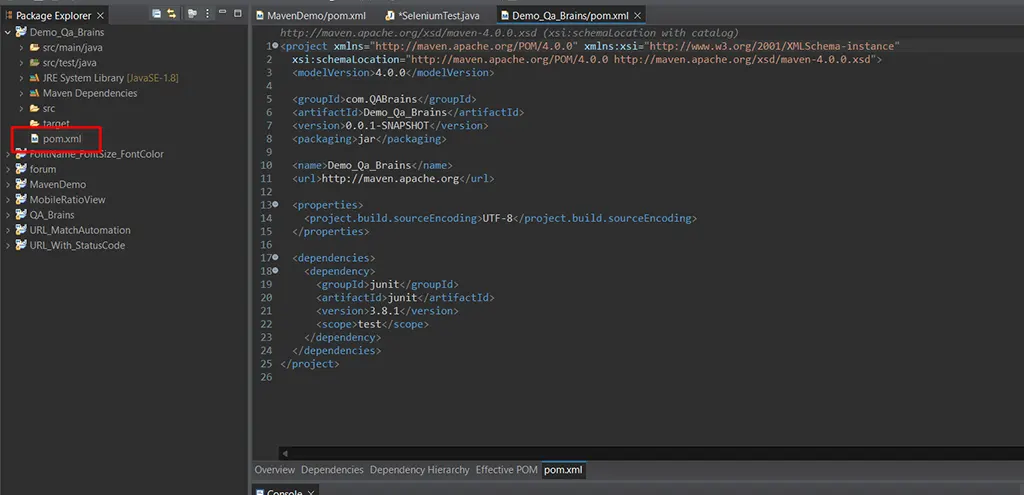
- Open pom.xml:
- In the root directory of your project, open the pom.xml file. This file contains essential project configuration.
- Screenshot here:
- Opening pom.xml in an IDE
- POM File Sections:
- Dependencies: Add libraries and frameworks your project depends on.
- Build: Customize how your project is built.
- Plugins: Add plugins to extend Maven’s functionality.
Adding Dependencies
Step 4: Managing Dependencies
- Add Dependencies in pom.xml:
- Open the pom.xml file.
- Add dependencies inside the <dependencies> section.
Example:
xml
Copy code
<project xmlns="http://maven.apache.org/POM/4.0.0"

xmlns:xsi="http://www.w3.org/2001/XMLSchema-instance"

xsi:schemaLocation="http://maven.apache.org/POM/4.0.0 http://maven.apache.org/xsd/maven-4.0.0.xsd">

<modelVersion>4.0.0</modelVersion>

<groupId>com.QABrains</groupId>

<artifactId>Demo_Qa_Brains</artifactId>

<version>0.0.1-SNAPSHOT</version>

<packaging>jar</packaging>

<name>Demo_Qa_Brains</name>

<url>http://maven.apache.org</url>

<properties>

<project.build.sourceEncoding>UTF-8</project.build.sourceEncoding>

</properties>

<dependencies>

<!-- JUnit dependency -->

<dependency>

<groupId>junit</groupId>

<artifactId>junit</artifactId>

<version>4.12</version>

<scope>test</scope>

</dependency>

<!-- Selenium Java dependency -->

<dependency>

<groupId>org.seleniumhq.selenium</groupId>

<artifactId>selenium-java</artifactId>

<version>3.141.59</version>

</dependency>

<!-- TestNG dependency -->

<dependency>

<groupId>org.testng</groupId>

<artifactId>testng</artifactId>

<version>7.4.0</version>

<scope>test</scope>

</dependency>

<dependency>

<groupId>io.github.bonigarcia</groupId>

<artifactId>webdrivermanager</artifactId>

<version>5.0.3</version>

<scope>test</scope>

</dependency>

</dependencies>

</project>
Save the pom.xml file to update the project’s dependencies.
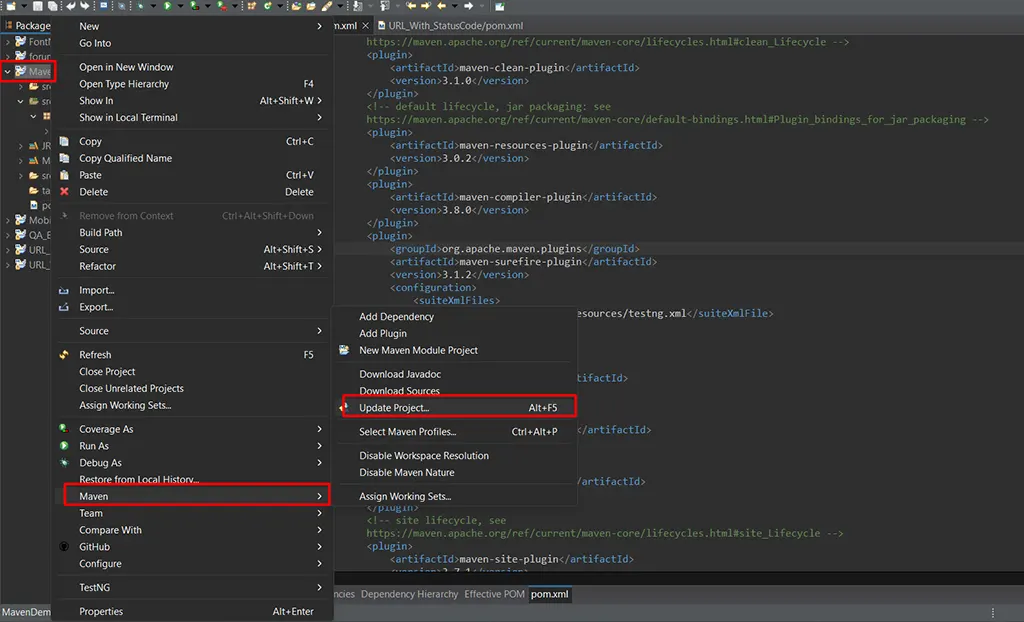
- Update Project:
- Right-click on the project in Eclipse and select Maven > Update Project.
Building and Running the Project
Step 1: Set Up Test Case
Let’s now create a simple test case to verify our Selenium 4 setup:
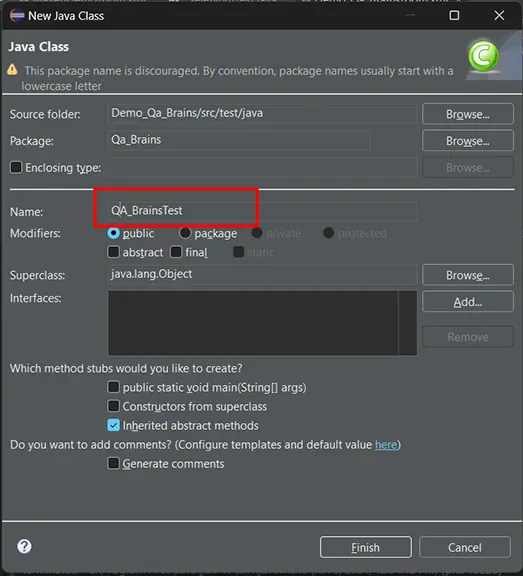
- Create a package or use the package created by default
- Create your First Test Class
- Import the necessary Selenium 4 packages

import org.openqa.selenium.WebDriver;

import org.openqa.selenium.chrome.ChromeDriver;
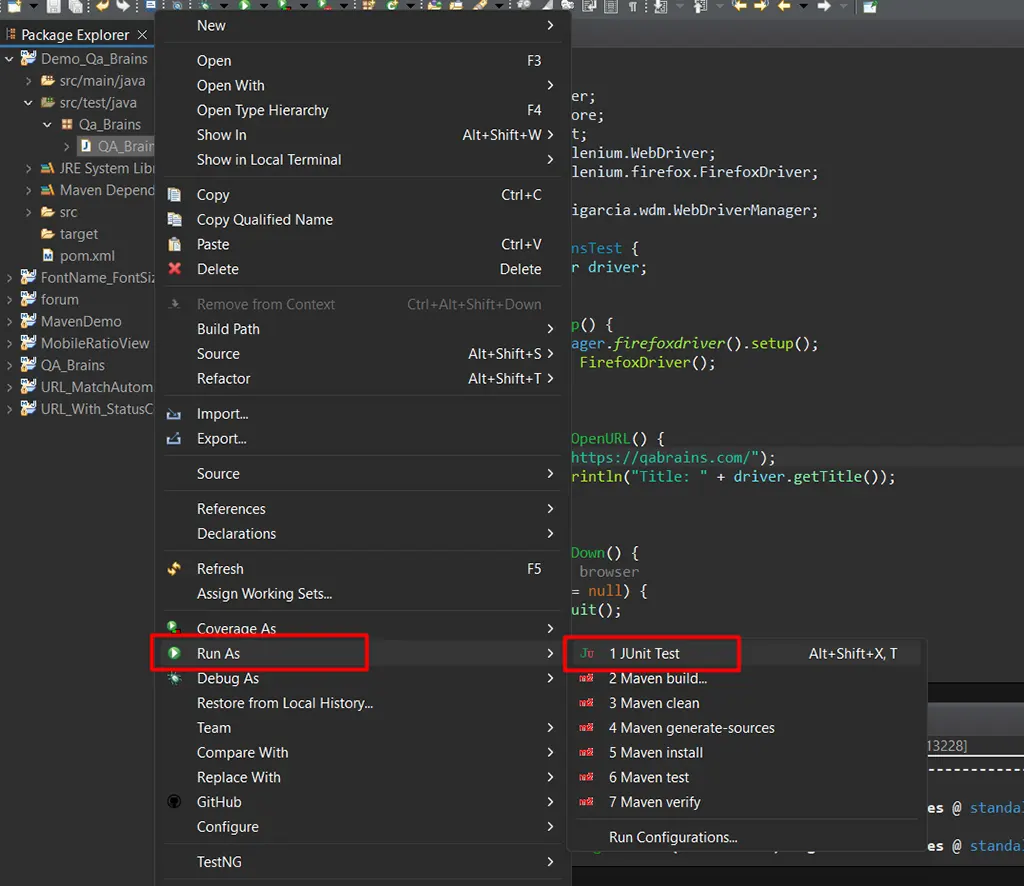
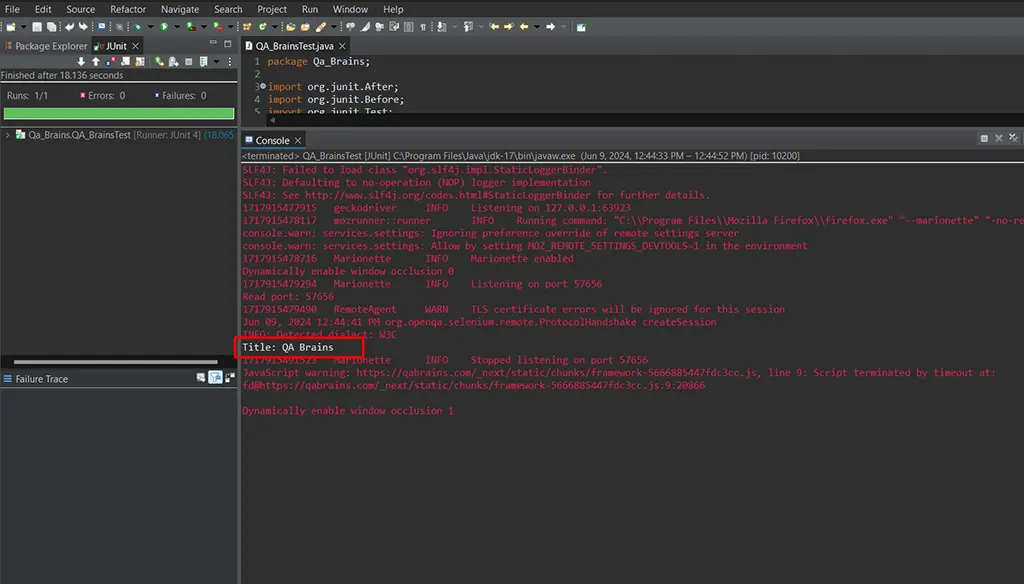
Step 2: Run the Test Finally, let’s run our Selenium 4 test case
- Right-click on the Java class and select “Run As” -> “JUnit Test / Java Application.”
If the test runs successfully, you should see the QABrains website open in the browser window.
Conclusion
Maven is an indispensable tool for managing Java projects. It simplifies dependency management, project setup, and build processes. By following this guide, you should now have a solid foundation for using Maven effectively. Make sure to explore Maven’s extensive documentation and community for more advanced usage and troubleshooting.
Additional Resources:
This page was last edited on 29 July 2024, at 4:04 pm

Start a conversation with our team to solve complex challenges and move forward with confidence.